If you’ve only been using Webhook.site to inspect incoming webhooks, you’re missing its most powerful feature.
Custom Actions let you build visual workflows that automatically run every time your unique URL receives a request or email. You can extract data, transform it, send notifications, update spreadsheets, call APIs, and much more — all without managing servers or writing backend code.
In this tutorial, you’ll create your very first working workflow in under 10 minutes.
What We’re Going to Build
A simple but useful “New Lead Notifier” workflow:
- Receive a webhook containing contact form or lead data (JSON)
- Automatically extract the important fields (name, email, company, message)
- Post a clean, formatted notification to a Slack channel
This is the kind of automation that usually requires Zapier, Make.com, or custom code. With Webhook.site Custom Actions, you can do it visually in minutes.
Prerequisites
- A Webhook.site account with Custom Actions enabled (available on Basic, Pro, and Enterprise plans)
- A Slack workspace where you can create an Incoming Webhook (takes about 30–60 seconds if you don’t have one)
Step 1: Get Your Webhook.site URL Ready
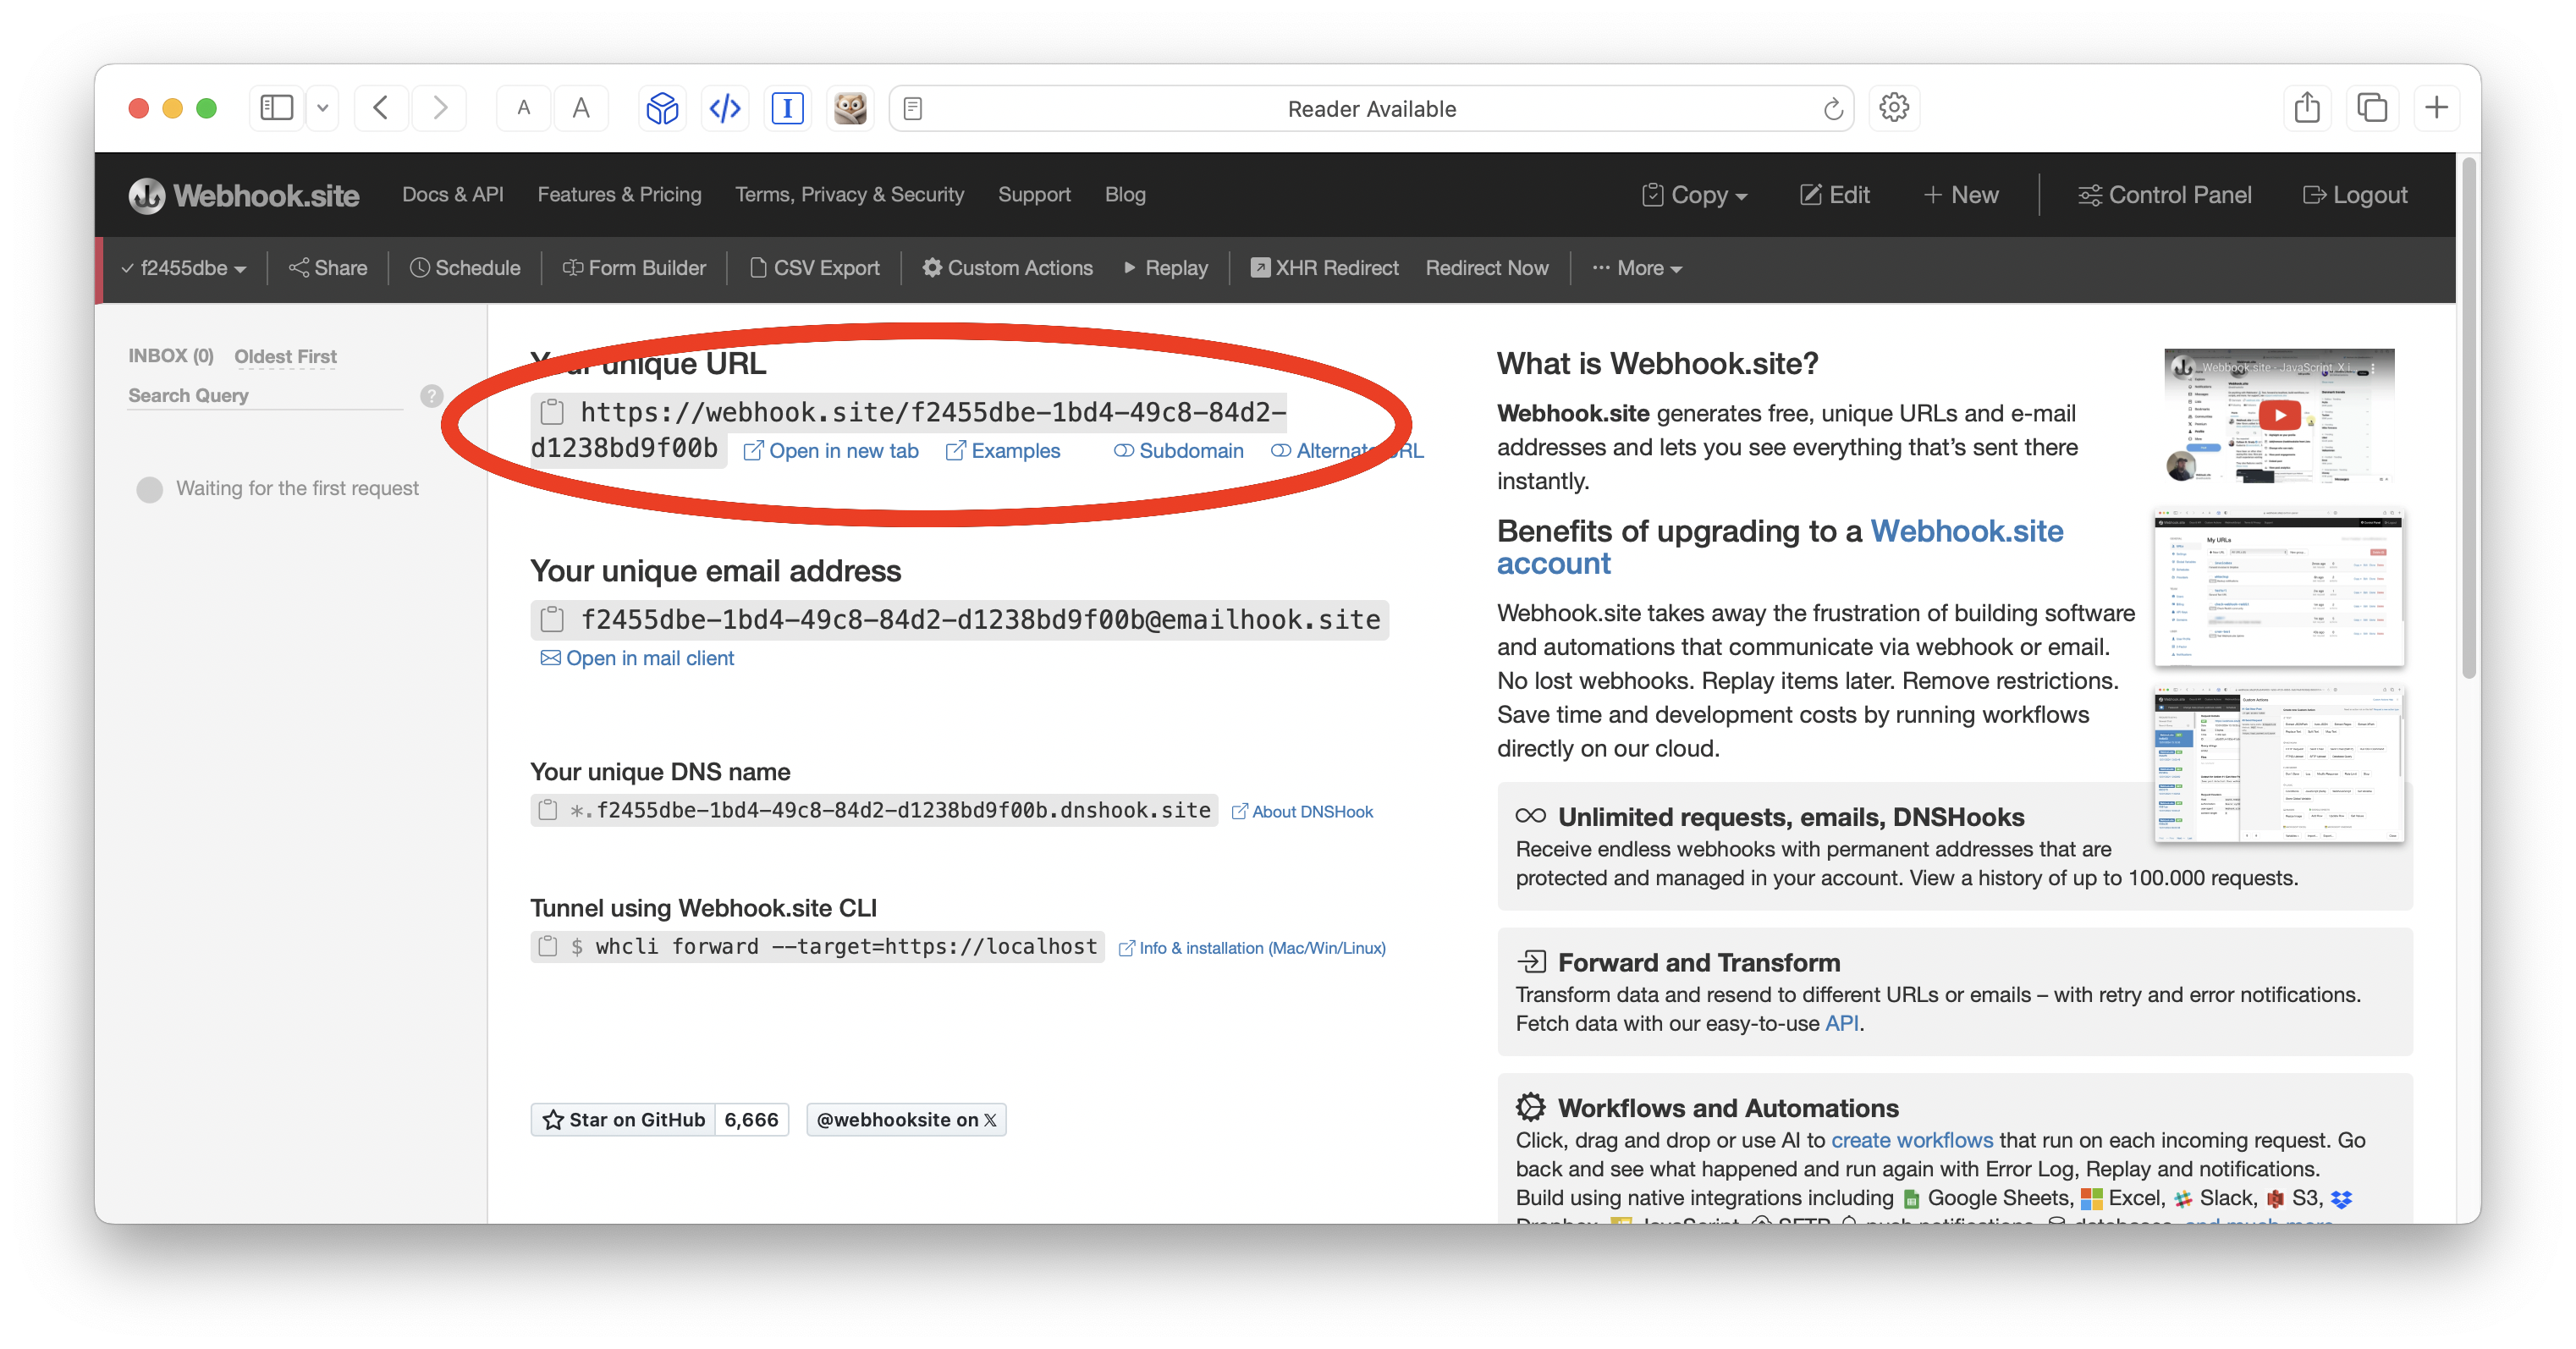
If you don’t already have one, create a new URL at Webhook.site.
You’ll see your unique URL (something like https://webhook.site/your-unique-id). Keep this tab open — we’ll use it to test later.
Step 2: Open the Custom Actions Editor
On your URL page, look for the Custom Actions (or Workflows) section and open the editor.
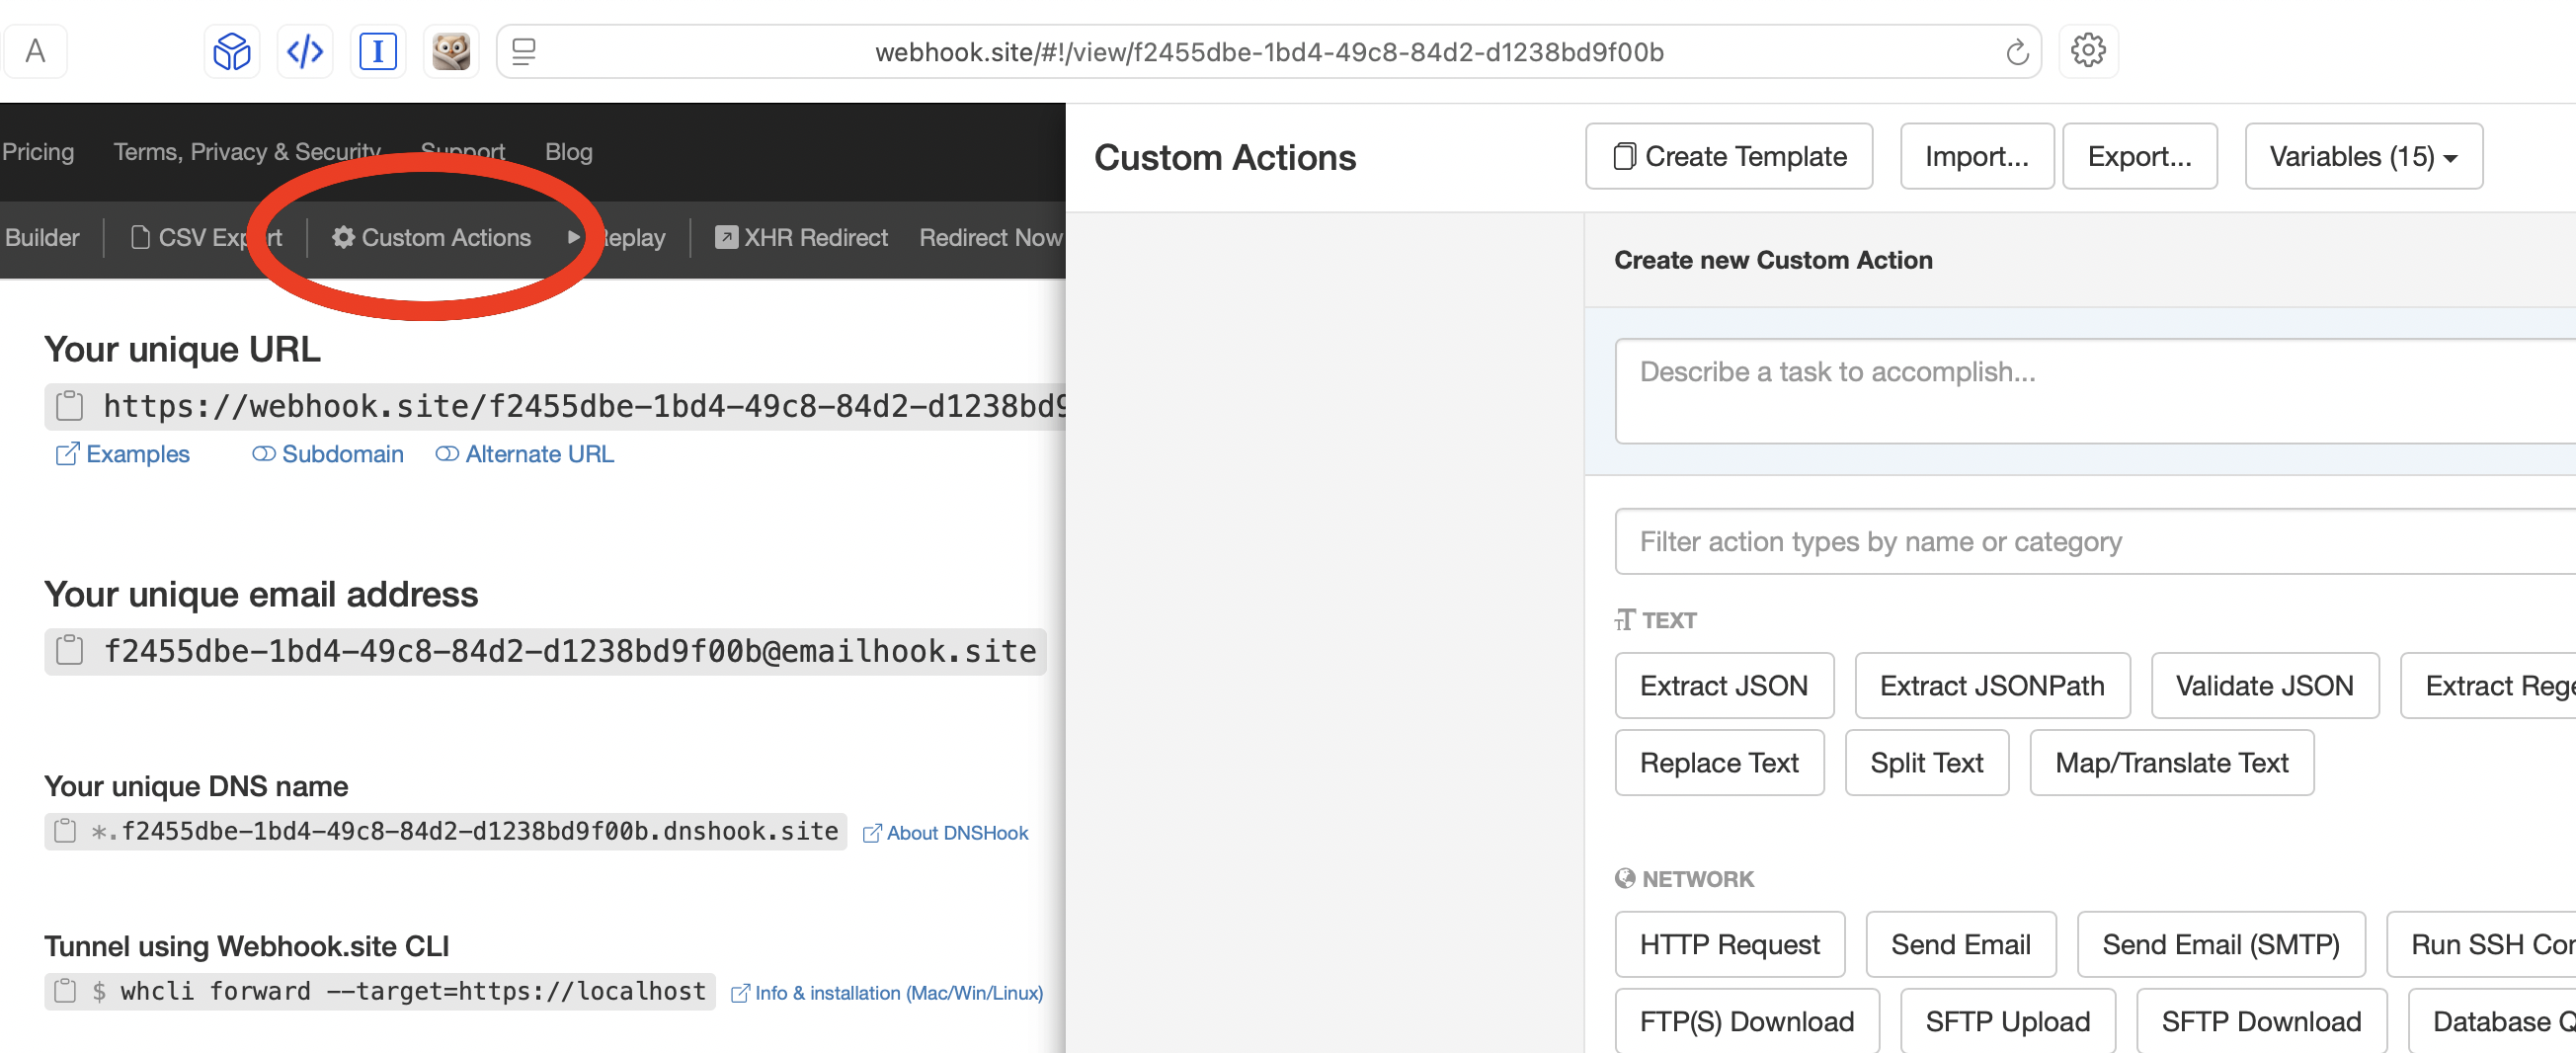
You should see an interface where you can add actions that will run automatically whenever a request hits your URL.
Tip: You can also use the AI assistant at the top of the editor. Try typing something like “When a new lead comes in, extract the data and post it to Slack” and let it generate a starting workflow for you.
Step 3: Add the Extract JSON Action
This is usually the first action in most workflows.
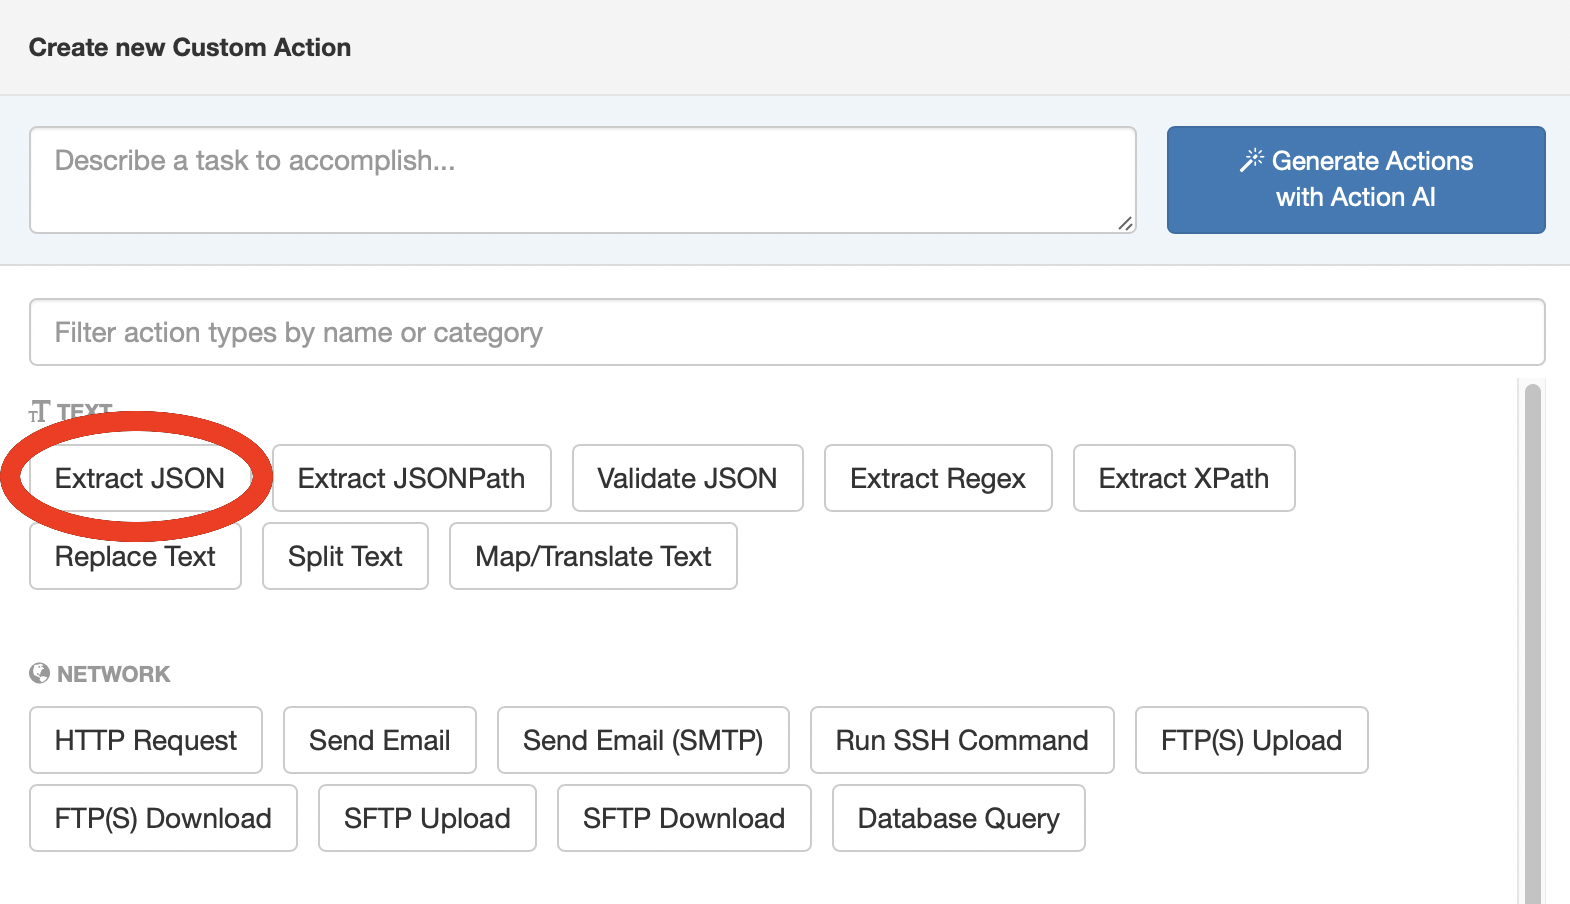
- Click Add Action (or the + button).
- Search for and select Extract JSON.
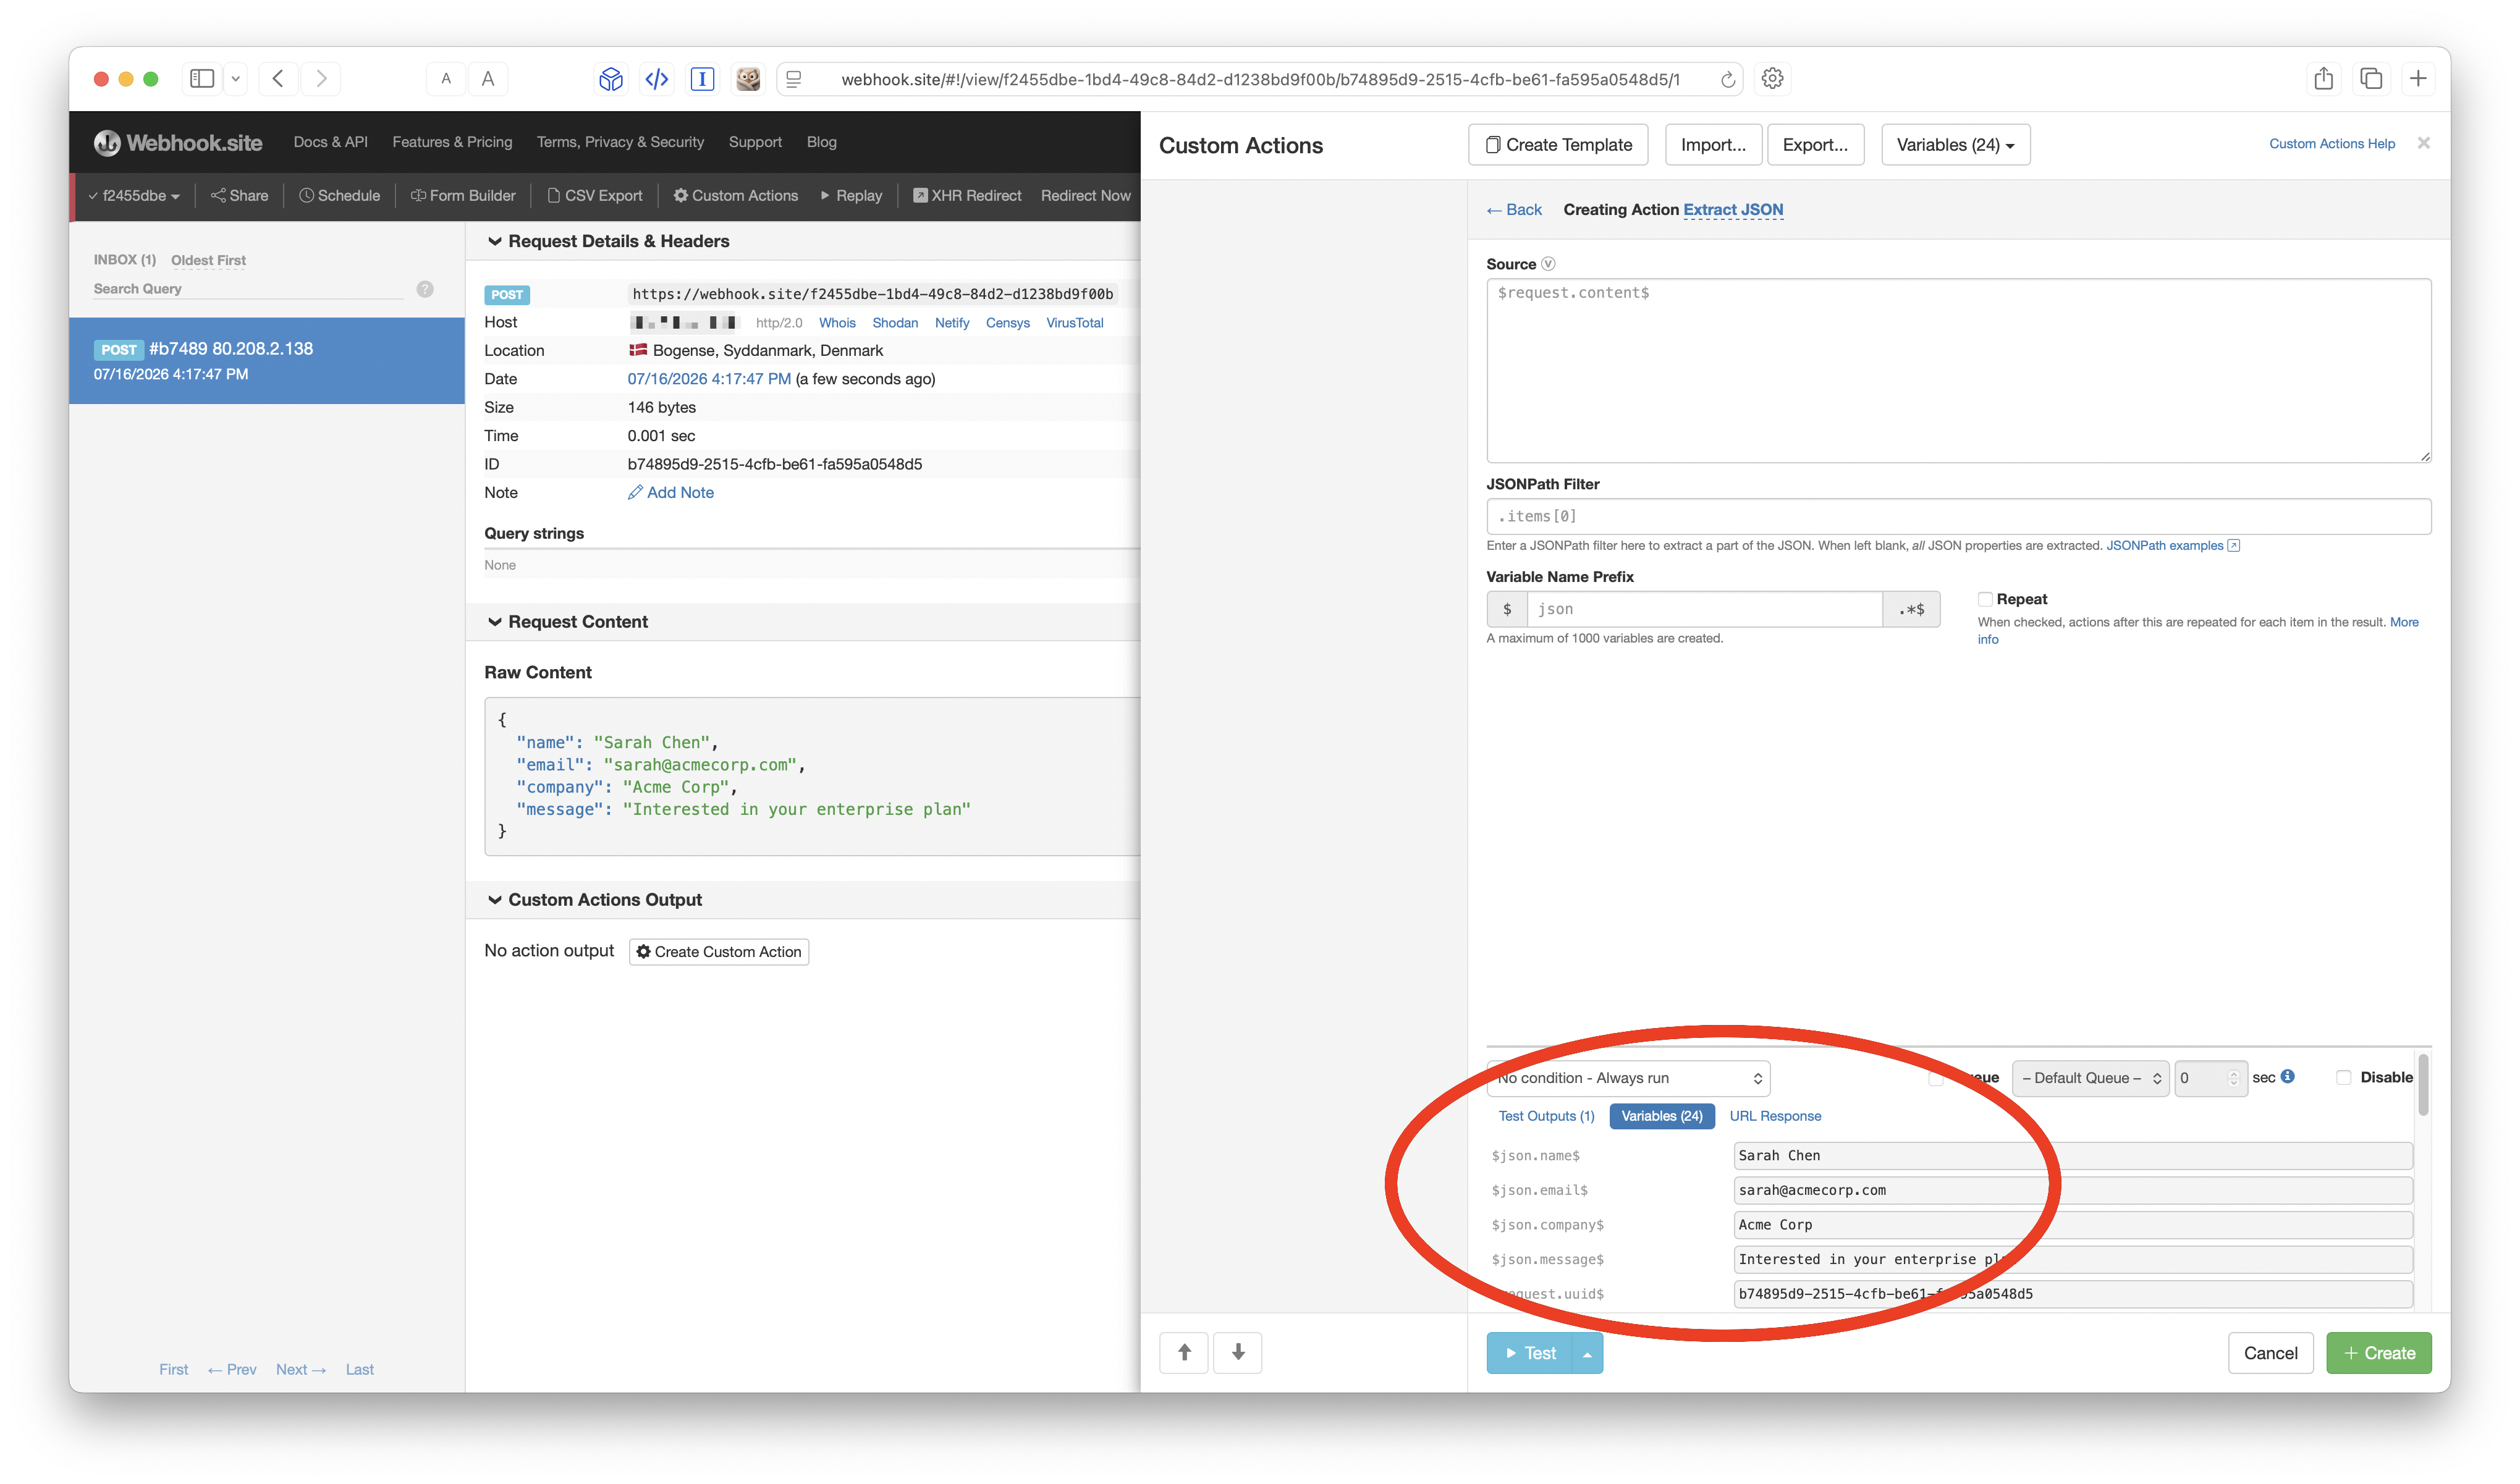
- Leave the default settings (it will automatically read from
$request.content$— the body of the incoming webhook). - Save the action.
This action will automatically turn the JSON fields in your webhook into variables you can use in later steps (e.g. $json.name$, $json.email$, $json.company$, etc.).
Step 4: Add the Slack Notification Action
Now let’s make the workflow actually do something useful.
-
Click Add Action again.
-
Search for and select Slack.
-
Configure it:
-
Slack Webhook URL: Paste the Incoming Webhook URL from your Slack workspace.
-
Message: Write something like:
🚀 New lead received!

**Name:** $json.name$
**Email:** $json.email$
**Company:** $json.company$
**Message:** $json.message$
(You can use any variables created by the Extract JSON action above.)
-
-
Save the action.
Your workflow should now have two actions in sequence: Extract JSON → Slack.
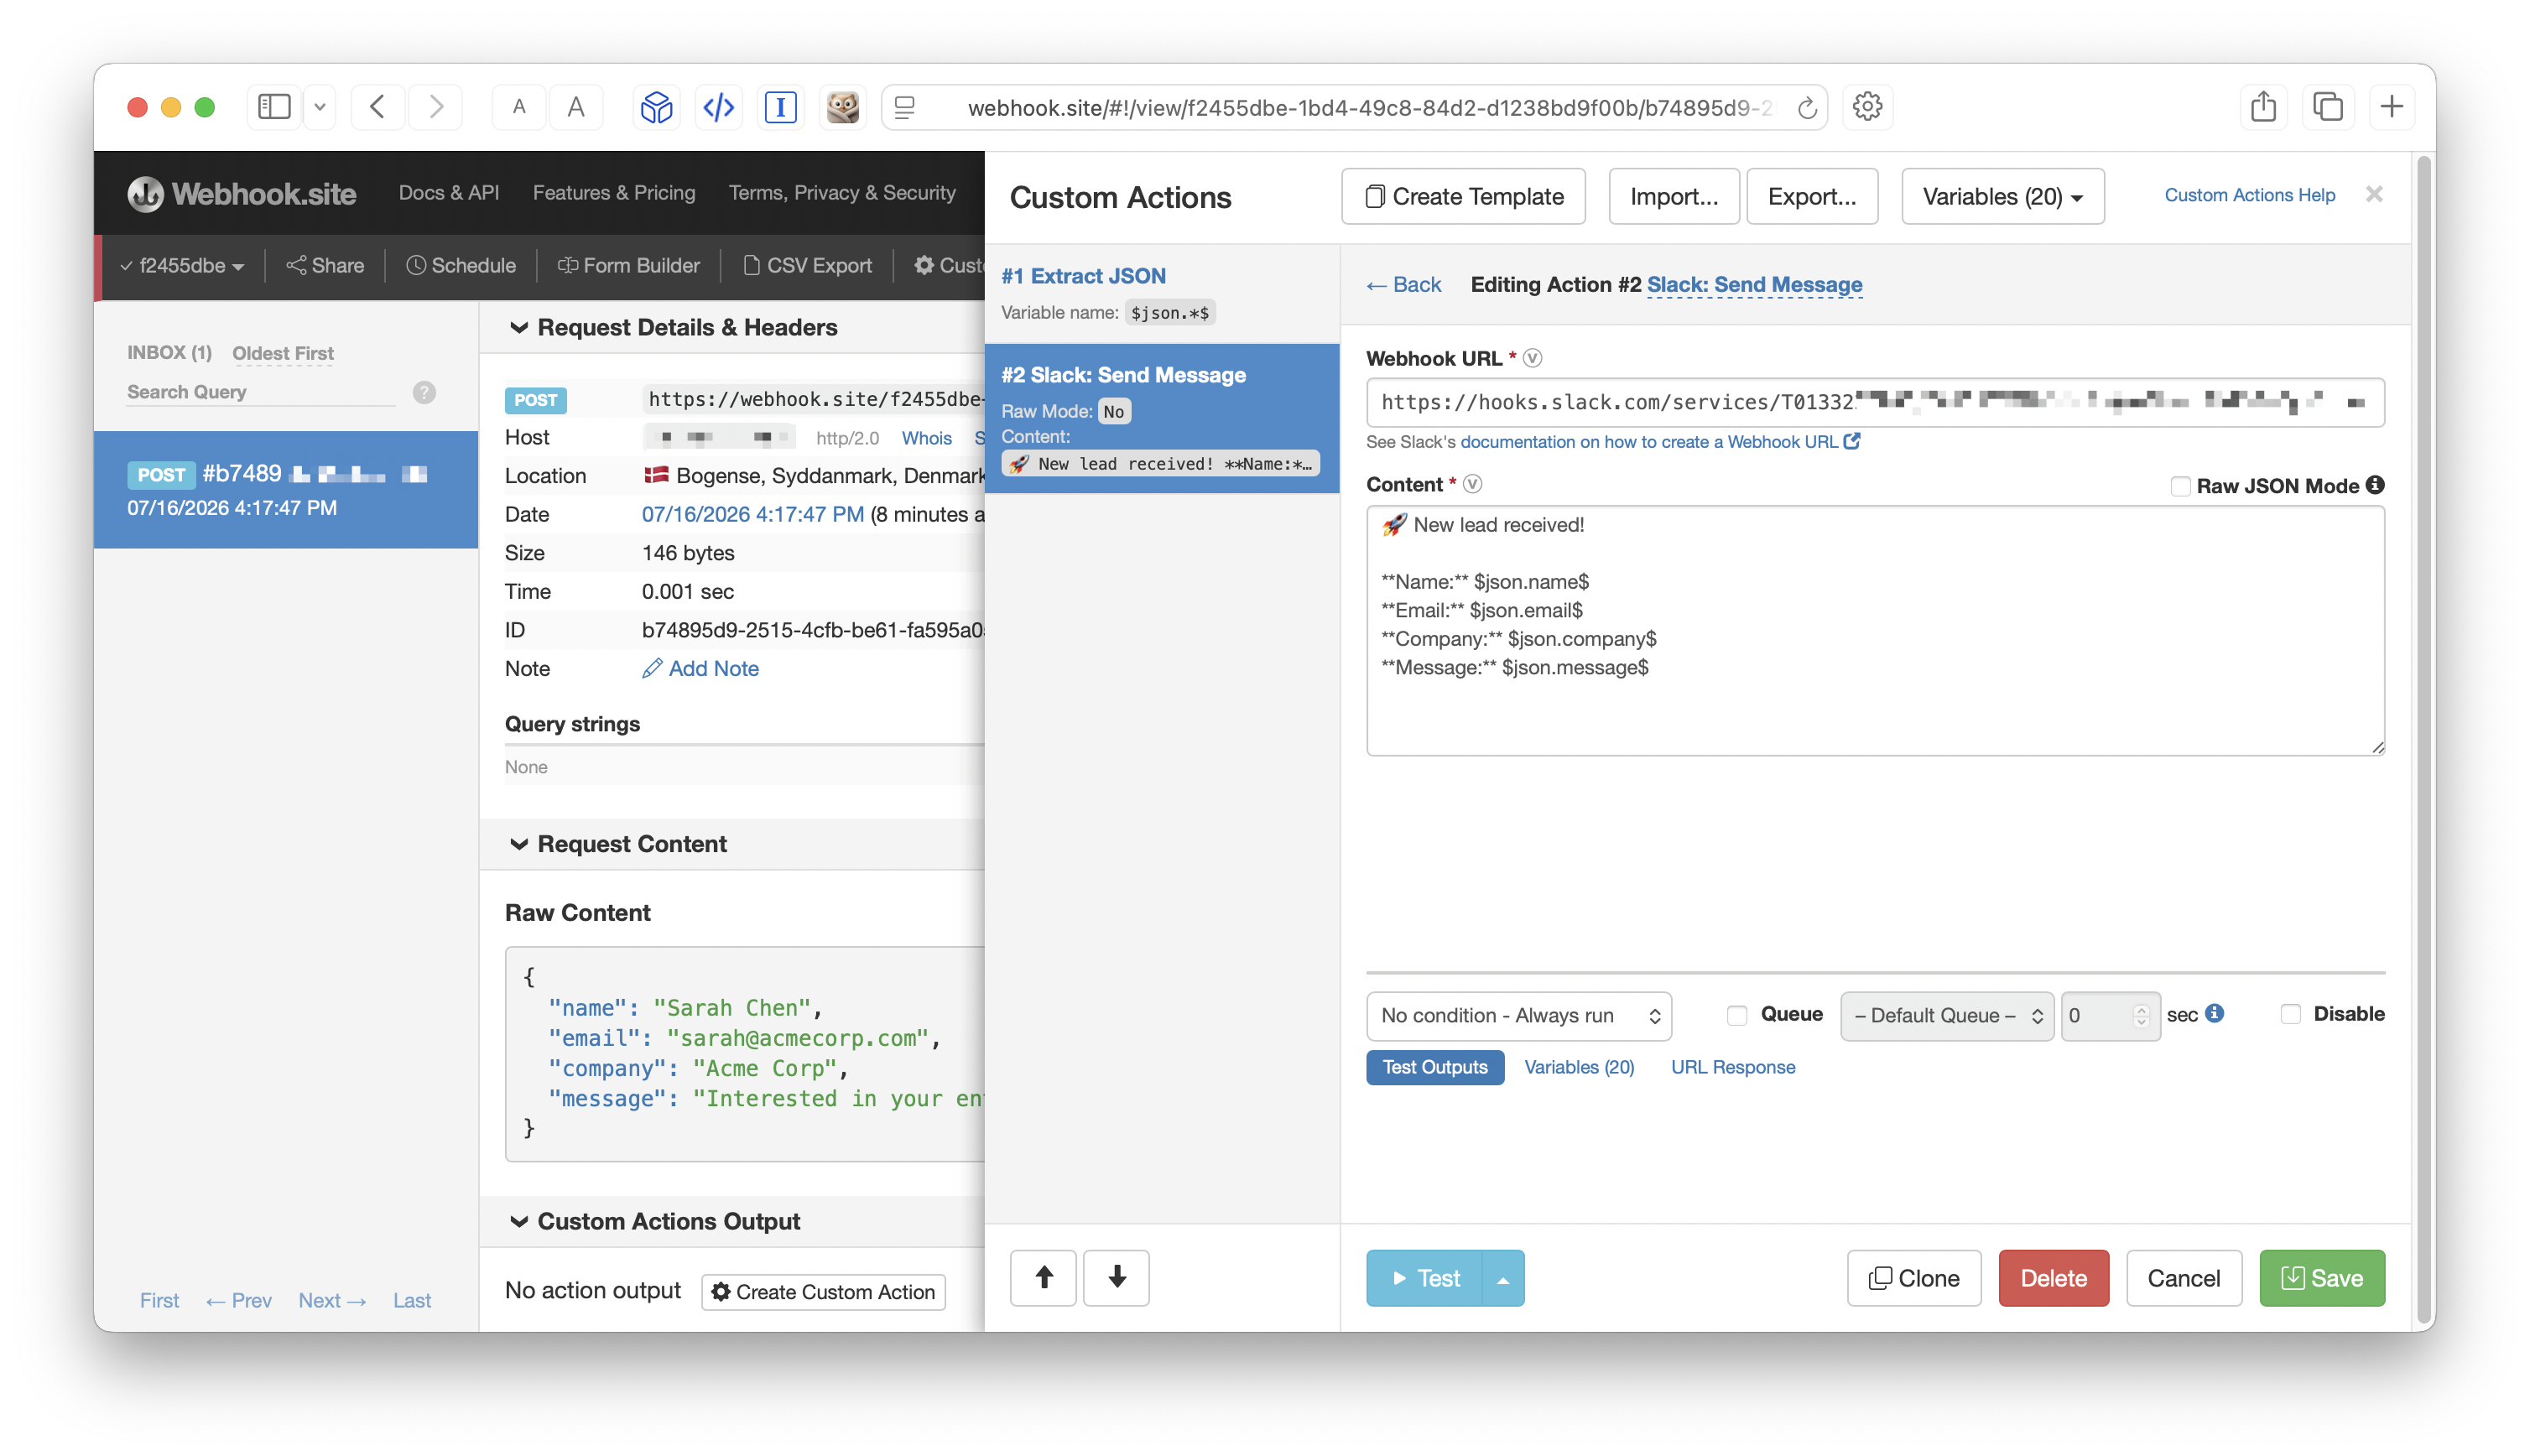
Actions run from top to bottom, and variables flow between them automatically.
Step 5: Test Your Workflow
It’s time to see it in action.
Send a test webhook to your URL using curl - remember to replace your-unique-id with your webhook's ID.
curl -X POST https://webhook.site/your-unique-id \
  -H "Content-Type: application/json" \
  -d '{
    "name": "Sarah Chen",
    "email": "sarah@acmecorp.com",
    "company": "Acme Corp",
    "message": "Interested in your enterprise plan"
  }'
If you're on a Windows, Mac or Linux computer, you can open your Terminal app and copy the command right in. Otherwise, if you're more comfortable using a graphical application, you can also import the command into something like Postman, Insomnia or RapidAPI.
After sending the request, it should show up immediately on Webhook.site. Click on the request in the Inbox sidebar on the left.
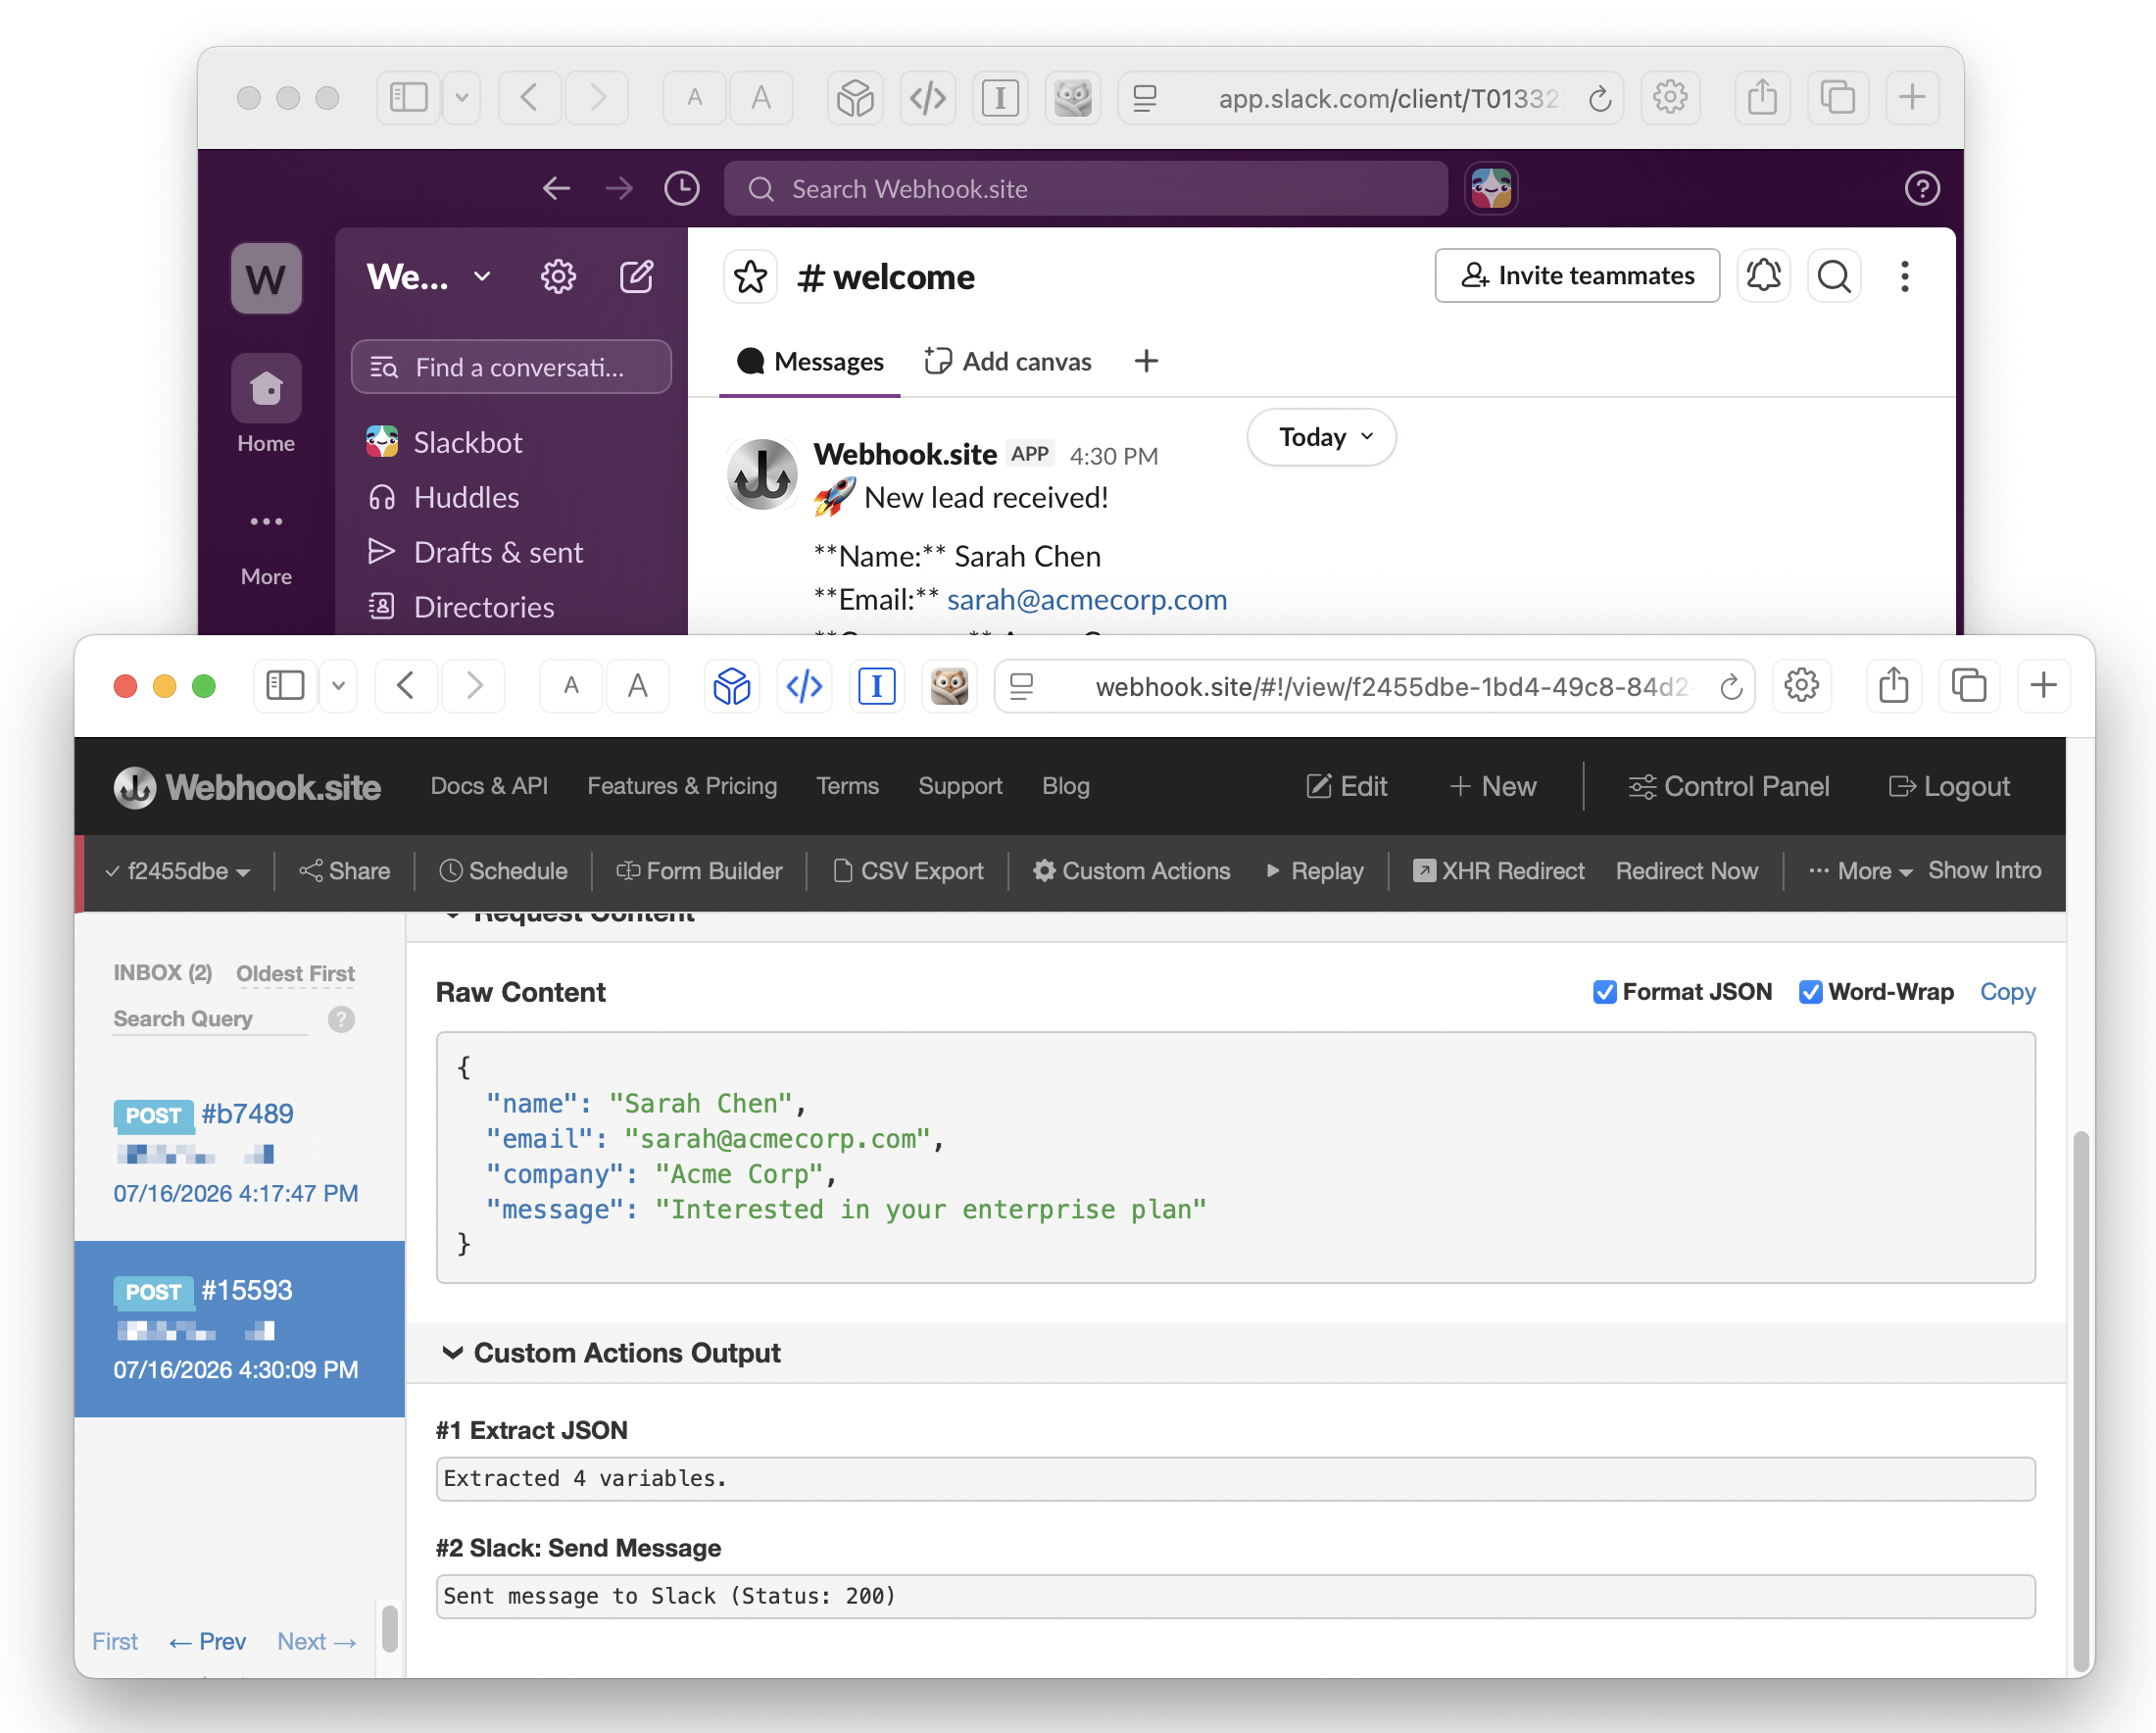
You should see:
- The original request data
- The output of the Extract JSON action (showing the variables it created)
- The output of the Slack action (confirming the message was sent)
Check your Slack channel — you should see the nicely formatted notification appear almost instantly.
Step 6: View Execution Details & Debug
One of the best parts of Webhook.site Custom Actions is visibility.
Click into the request and expand each action’s output. You can see exactly what was sent and any errors.
If something doesn’t work as expected:
- Use the Replay feature to re-run the workflow on the same request after fixing an action.
- Check the Error Log for failed executions.
What’s Next?
Congratulations — you just built your first automation!
Here are some easy next steps to explore:
- Add a Condition action so the Slack message only sends if
companyis not empty. - Add a Google Sheets action to also log the lead in a spreadsheet.
- Try the AI workflow builder with a more complex request (e.g., “Parse the webhook, check if the amount is over $1000, and send an email if true”).
- Experiment with JavaScript actions for more advanced logic.
Final Thoughts
Custom Actions turn Webhook.site from a useful debugging tool into a complete automation platform. You can now handle real business workflows — lead notifications, payment processing, CI/CD triggers, data synchronization, and more — without spinning up servers or paying per-task fees on traditional automation tools.
Ready to build something more advanced? Try one of the other workflows in this series or explore the full list of available actions in the Custom Actions documentation.